DeepMicroscopy – my portable ML laboratory
30 Jul 2020
Today I’m very happy to finally release my open source project DeepMicroscopy. In this project I have created the platform where you can capture the images from the microscope, annotate, train the Tensorflow model and finally observe real time object detection. The project is configured on the Jetson Nano device thus it can work with compact and portable solutions.
The project code is available on my github https://github.com/qooba/deepmicroscopy
Before you will continue reading please watch quick introduction:
1. Architecture
The solution requires three devices:
- Microscope with usb camera - e.g. Velleman CAMCOLMS3 2Mpx
- Inference server - Jetson Nano
- Training server - PC equipped with GPU card e.g. NVIDIA GTX 1050 Ti
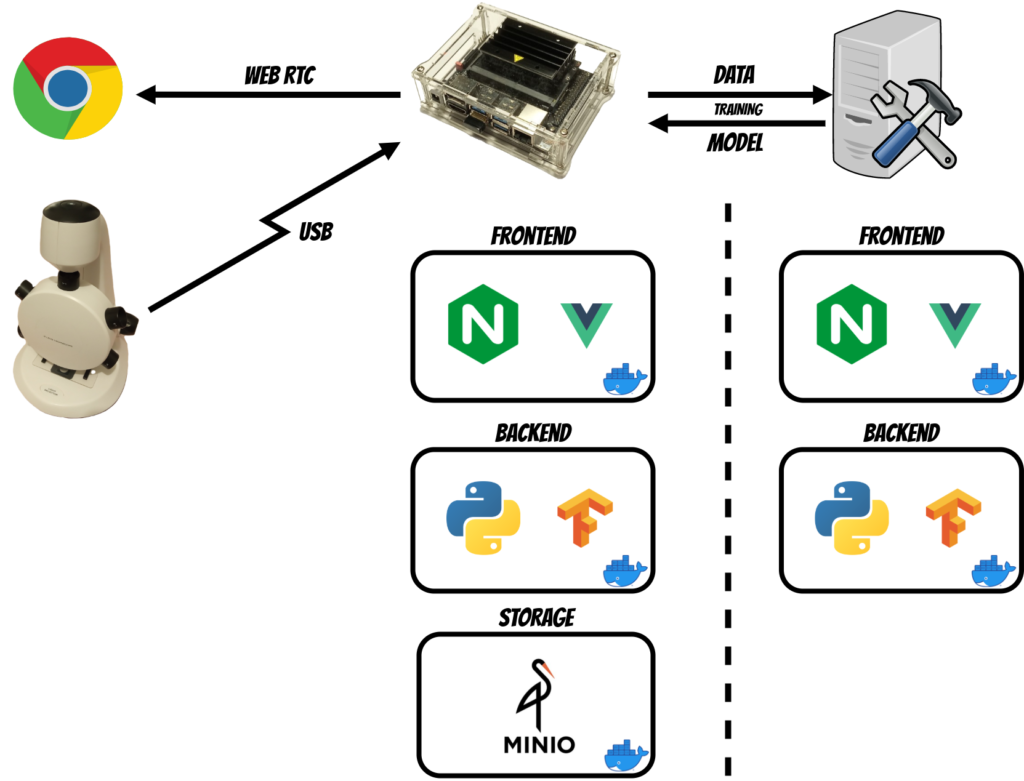
The whole solution was built using docker images thus now I will describe components installed on each device.
Jetson
The Jetson device contains three components:
- Frontend - Vue application running on Nginx
- Backend - Python application which is the core of the solution
- Storage - Minio storage where projects, images and annotations are stored
Training Server
The training server contains two components:
- Frontend - Vue application running on Nginx
- Backend - Python application which handles the training logic
2. Platform functionalities
The most of platform’s functionality is installed on the Jetson Nano. Because the Jetson Nano compute capabilities are insufficient for model training purposes I have decided to split this part into three stages which I will describe in the training paragraph.
Projects management
In the Deep Microscopy you can create multiple projects where you annotate and recognize different objects.
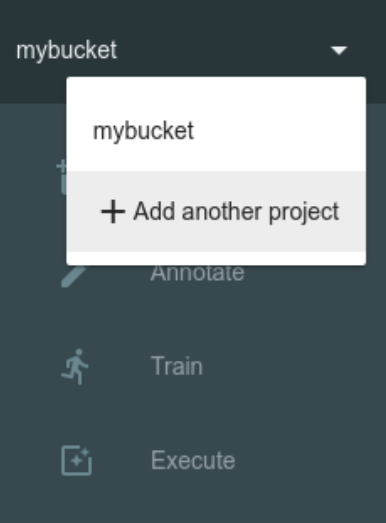
You can create and switch projects in the top left menu. Each project data is kept in the separate bucket in the minio storage.
Images Capture
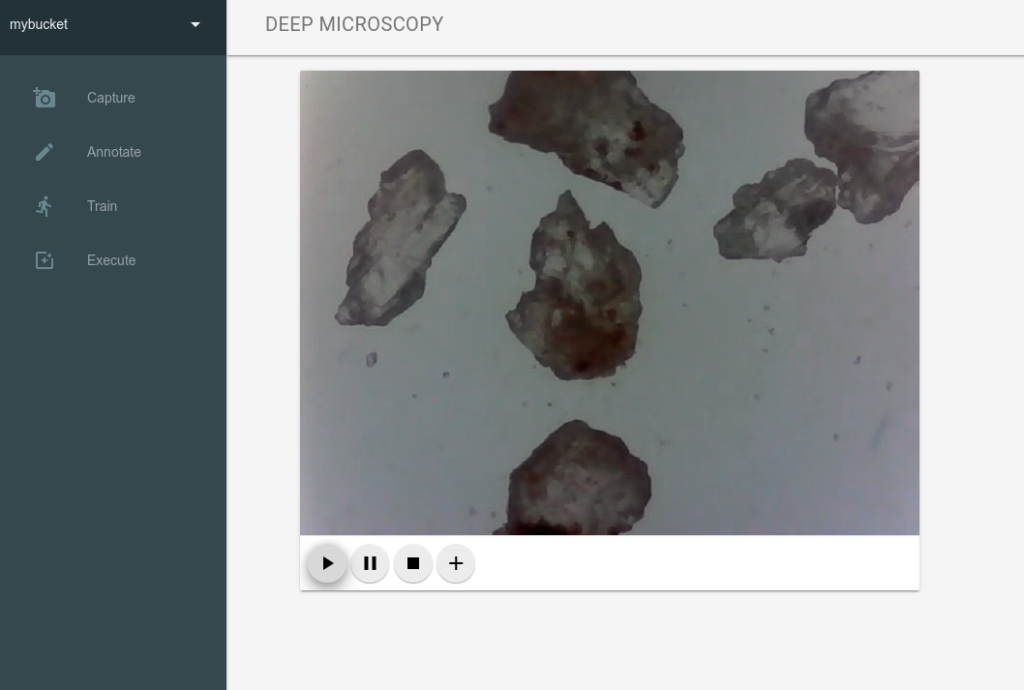
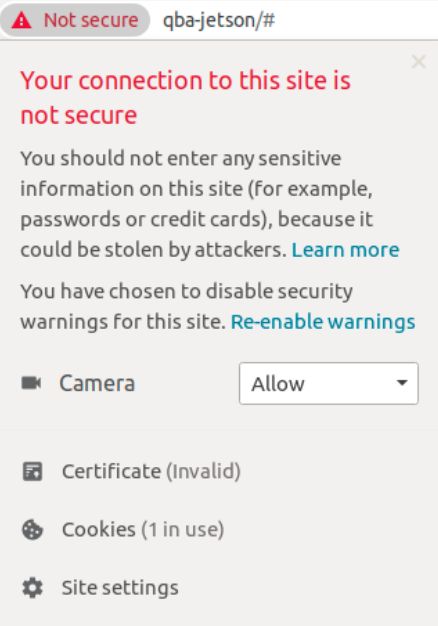
When you open the Capture panel in the web application and click Play ▶ button the WebRTC socket between browser and backend is created (I have used the aiortc python library). To make it working in the Chrome browser we need two things:
- use TLS for web application - the self signed certificate is already configured in the nginx
- allow Camera to be used for the application - you have to set it in the browser
Now we can stream the image from camera to the browser (I have used OpenCV library to fetch the image from microscope through usb).
When we decide to capture specific frame and click Plus ✚ button the backend saves the current frame into project bucket of minio storage.
Annotation
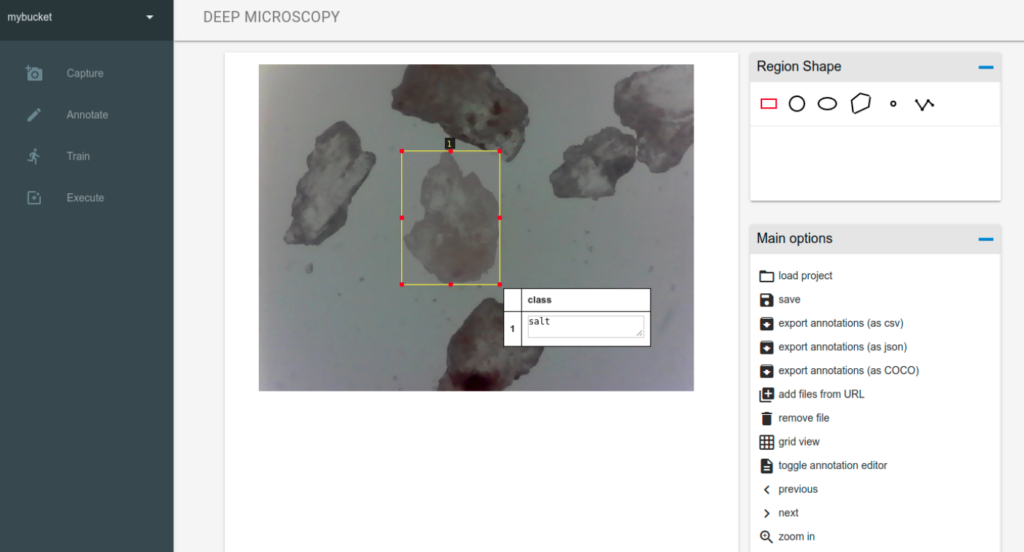
The annotation engine is based on the Via Image Annotator. Here you can see all images you have captured for specific project. There are a lot of features eg. switching between images (left/right arrow), zoom in/out (+/-) and of course annotation tools with different shapes (currently the training algorithm expects the rectangles) and attributes (by default the class attribute is added which is also expected by the training algorithm).
This is rather painstaking and manual task thus when you will finish remember to save the annotations by clicking save button (currently there is no auto save). When you save the project the project file (with the via schema) is saved in the project bucket.
Training
When we finish image annotation we can start model training. As mentioned before it is split into three stages.
Data package
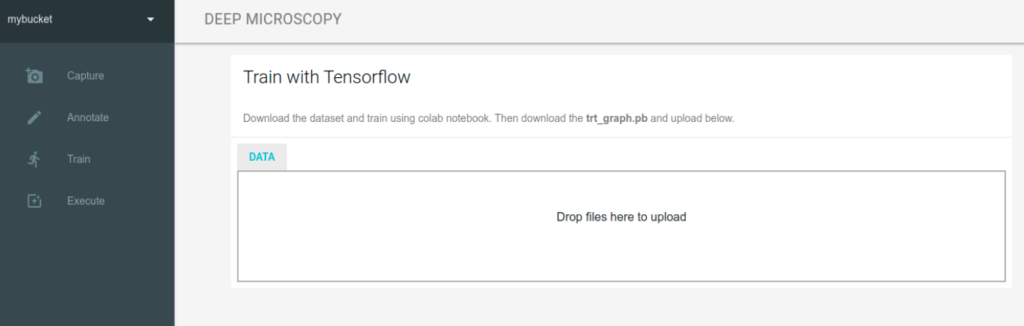
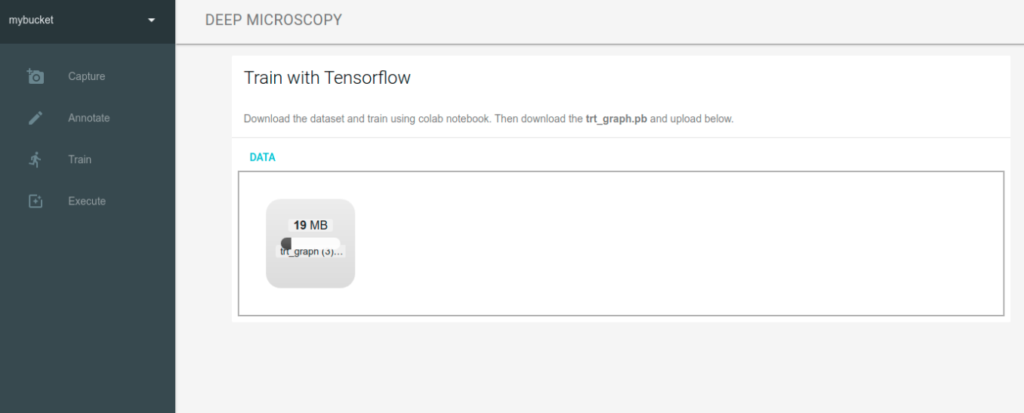
At the beginning we have to prepare data package (which contains captured images and our annotations) by clicking the DATA button.
Training server
Then we drag and drop the data package to the application placed on machine with higher compute capabilities.
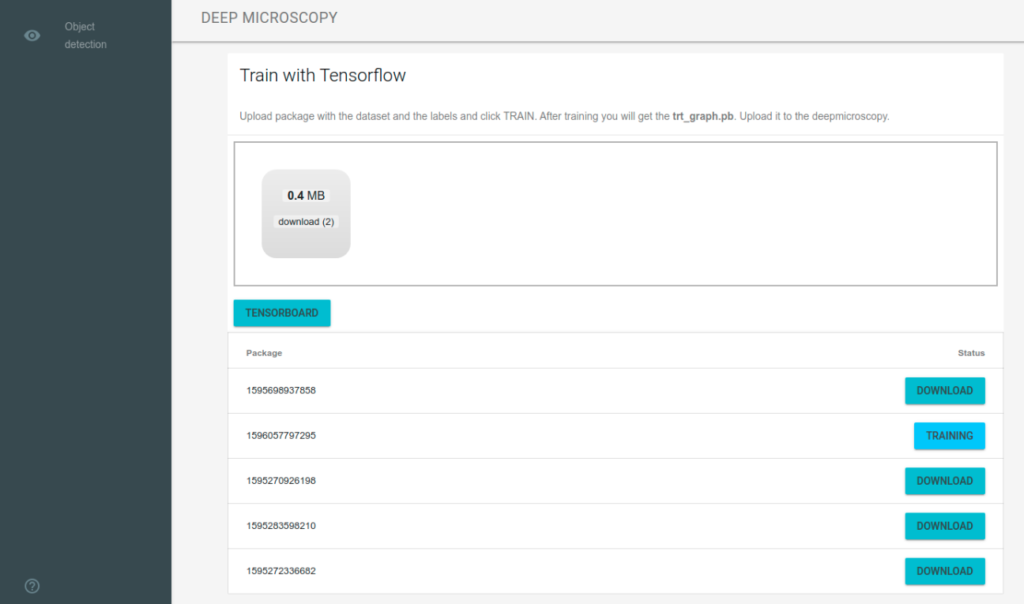
After upload the training server automatically extracts the data package, splits into train/test data and starts training. Currently I have used the MobileNet V2 model architecture and I base on the pretrained tensorflow model.
When the training is finished the model is exported using TensorRT which optimizes the model inference performance especially on NVIDIA devices like Jetson Nano.
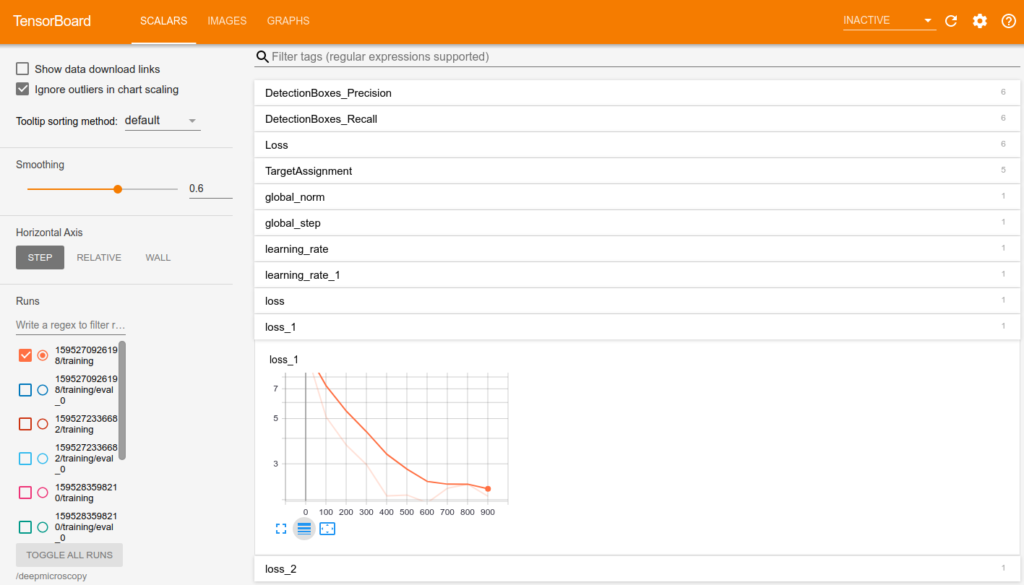
During and after training you can inspect all models using builtin tensorboard.
The web application periodically check training state and when the training is finished we can download the model.
Uploading model
Finally we upload the TensorRT model back to the Jetson Nano device. The model is saved into selected project bucket thus you can use multiple models for each project.
Object detection
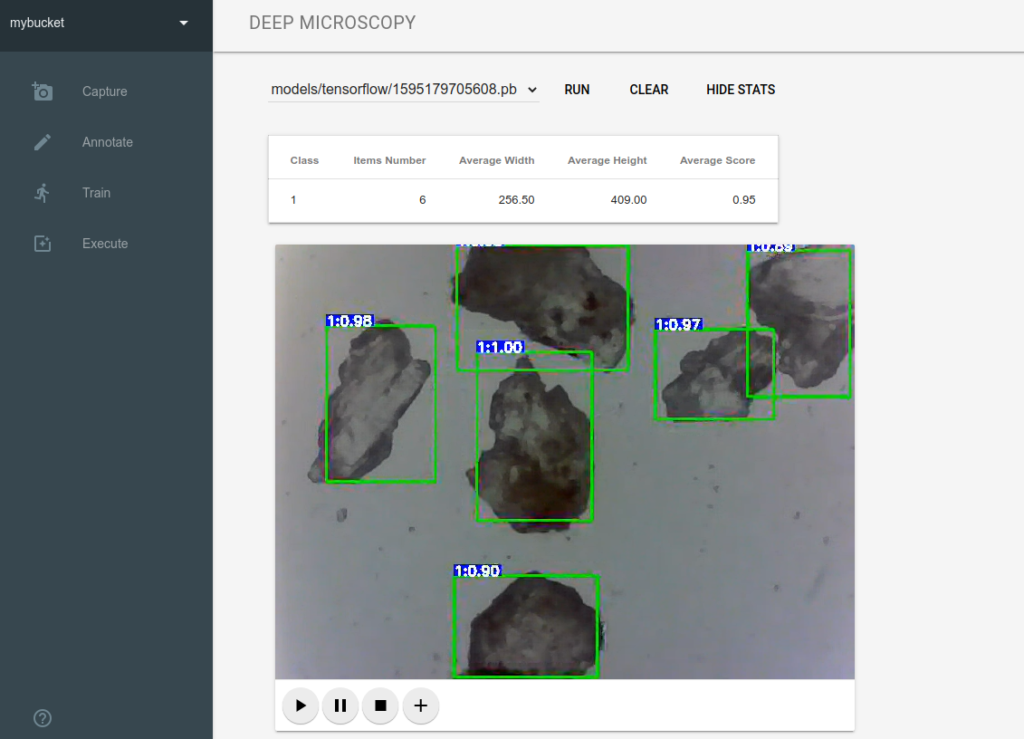
On the Execute panel we can choose model from the drop down list (where we have list of models uploaded for selected project) and load the model clicking RUN (typically it take same time to load the model). When we click Play ▶ button the application shows real time object detection. If we want to change the model we can click CLEAR and then choose and RUN another model.
Additionally we can fetch additional detection statistics which are sent using Web Socket. Currently the number of detected items and average width, height, score are returned.
3. Setup
To start working with the Jetson Nano we have to install Jetson Nano Developer Kit.
The whole platform is working with Docker and all Dockerfiles are included in the GitHub repository
Because Jetson Nano has aarch64 / arm64 architecture thus we need separate images for Jetson components.
Jetson dockers:
- front - frontend web app
- app - backend web app
- minio - minio storage for aarch64 / arm64 architecture
Training Server dockers:
- serverfront - frontend app
- server - backend app
If you want you can build the images by yourself or you can use built images from DockerHub.
The simplest option is to run run.app.sh on Jetson Nano and run.server.sh on Training Server which will setup the whole platform.
Thanks for reading :)